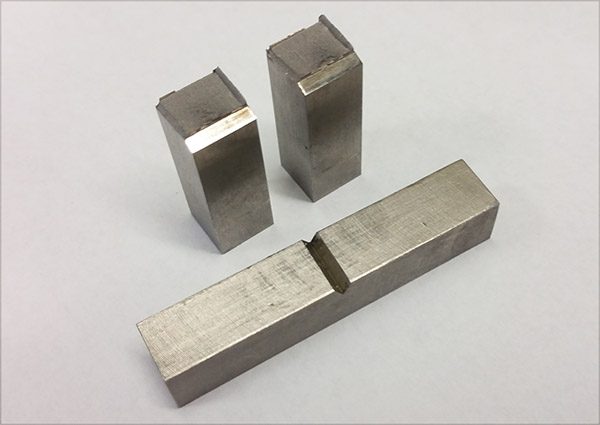
CHARPY IMPACT TESTING LAB
Charpy impact testing (also known as a Charpy V-Notch test) is a valuable method to determine the amount of energy a material absorbs during fracture. The test is performed when a pendulum head is dropped from a specified height and impacts a notched specimen of material. By comparing the difference in the height of the hammer before and after the fracture, one can measure the energy absorbed.
Charpy Impact Test Factors
Notch Toughness
Specimen’s toughness is exhibited while testing through the measure of energy absorbed during impact. Notch dimension and size are also considered during testing.
Temperature-Dependent Ductile-Brittle Transition
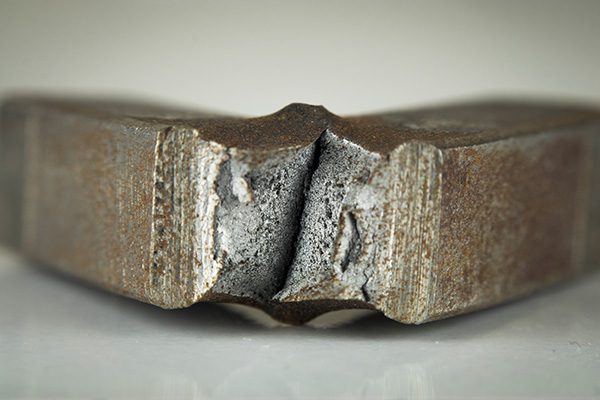
Compared by looking at the shear areas of broken Charpy specimens to estimate a percentage of each.
Per Specifications
Tests can be performed at exact temperatures from -320°F to 400°F
- ASTM A370
- ASTM E23
- ISO 148-1
- JIS Z 2242


Charpy Impact Test-IMR Advantage
Reliable Results
IMR Test results are reliable and dependable. Our experienced staff includes PhDs, engineers, chemists, metallurgists, and technicians, all dedicated to delivering fast, precise results.
State of the Art Equipment
IMR Test machines are state-of-the-art, as we continually invest in the latest technologies available for our services. Our evolving machine arsenal ensures we are able to reduce errors and deliver reliable results.
Measured Details
Charpy impact testing relies on pendulum position, adjusted starting angles, and readings throughout the process, details that IMR Test is dedicated to ensuring are accurately measured and reported.
Charpy Impact FAQ's
Charpy impact testing relies on pendulum position, adjusted starting angles, and readings throughout the process, details that IMR Test is dedicated to ensuring are accurately measured and reported.
Charpy impact testing determines notch toughness, temperature-dependent ductile-brittle transition rate, and ductility of a material.
Charpy impact testing is performed on metals.
Bend Testing
Bond Strength Testing
Charpy Impact Testing (-320°F to 450°F)
Climbing Drum Adhesion of Sandwich Composites
Coating Adhesion
Coating Shear Fatigue
Coefficient of Thermal Expansion by TMA
Composite Testing (Fiber Reinforced)
Compression Set
Compressive Properties
Core Shear Properties of Sandwich Construction by Beam Flexure
Creep and Stress Rupture Testing
DMA (Dynamic Mechanical Analyzer)
Ductility
Elastic Modulus
Fatigue Testing
Filled Hole Tension & Compression
Flattening
Flat-wise Tensile Testing
Flexural Properties
Floating Roller Peel Strength
Fracture Mechanics
Gel Time
Hardness (Rockwell, Brinell, Durometer, Shore, Barcol, Knoop, Vickers, Macro Vickers)
Heat Aging
Heat Deflection by TMA
Heat Treatment (furnace to 2100°F)
Hydrogen Embrittlement
Hydrostatic Pressure
Interlaminar Shear
Jominy Hardenability
Lap Shear Testing
Machining & Specimen Preparation
Materialography
Modulus of Rupture (MOR)
n-Value (Strain Hardening Exponent)
Open Hole Tension and Compression
Pipeline Integrity Testing
r-Value (Plastic Strain Ratio)
Residual Strength of Composites After Impact
Rotating Beam Fatigue
Shear Testing of Rivets to ASTM B565, Single/Double
Short Beam Strength
Shot Peen Qualification
Single-Edged Notched beams (SENB)
Slow Strain Rate (G129)
Specimen Conditioning
Strain Gaging
Surface Roughness (ANSI/ASME B46.1)
T Peel Strength
Tear Resistance of Films & Sheeting
Tear - Rubbers & Elastomers
Tensile Testing
Torsional and Axial Fatigue (200 lb)
Tube Testing (Tensile, Flare, Hydrostatic)
Welder & Procedure Qualification
Wire/Spring Testing (Wrap, Coil, Bend)
Young's, Tangent and Chord Modulus (Room Temperature)
CHARPY TESTING SPECIFICATIONS
- ASTM A370
- ASTM E23
- ISO 148-1
- JIS Z 2242
RELEVANT ACCREDITATIONS
Click here for a complete list of accreditations and certifications for all IMR Test Labs locations.


