Additive Manufacturing Materials Testing
As additive manufacturing moves from prototyping to mass production, the tolerance for defects and variability shrinks to zero. Manufacturers now require robust quality control, comprehensive material characterization, and stringent process validation. Testing isn’t just a step in the process; it’s a critical component for reliably and cost-effectively scaling AM operations.
Solving the Unique Challenges of AM Scaling
The rapid growth of additive manufacturing introduces unique challenges for raw materials and printed structures. From managing intricate alloy microstructures to validating new high-strength polymers, IMR Test Labs provides the expertise and capacity to identify density, strength, and fracture toughness for nickel, steel, and titanium alloys.
IMR Test Services for Additive Manufacturing
Material Characterization
Ensure chemical and physical consistency by analyzing powder morphology and elemental composition to prevent process-induced defects.
- Density & Porosity: We use Helium Pycnometry and the Archimedes method to measure the inverse relationship between density and porosity, ensuring that small particles fill gaps to prevent fatigue and cracking.
- Powder Analysis: Evaluation of Particle Size Distribution (PSD) and flowability.
- Chemical Analysis: Elemental composition for strength and post-processing optimization.
- Thermal Analysis (DSC, TGA)
Mechanical Testing
Verify functional strength and durability through rigorous stress testing to ensure AM parts meet or exceed the standards of traditional manufacturing methods.
- Strength & Durability: Full-suite testing, including Tensile, Fatigue, and Fracture Toughness, to validate that flexible AM designs maintain structural integrity.
- Hardness Testing: Vickers and Rockwell Scales
Non-Destructive Testing (NDT)
Identify internal anomalies like cracking and delamination without comprimising the integrity of your printed components.
- Cracking & Delamination: We detect solidification issues and melt-pool layer failures using Ultrasonic and CT Scanning.
- Residual Stress Analysis: Using X-Ray Diffraction (XRD) and Hole Drilling, we monitor stresses caused by heating/cooling cycles, specifically at the critical build plate interface.
Metallurgical Evaluation
Verify structural integrity by examining grain size, porosity, and surface finish to ensure your AM process meets density and strength requirements.
- Microstructural Analysis: Advanced Metallography to identify process-induced vs. gas-induced porosity that leads to cracks.
- Failure Analysis: Determining root causes of part fatigue or interface separation.
Corrosion Testing
Validate the long-term durability of new alloys and polymers in harsh environments to prevent degradation and material fatigue.
- Environmental Resistance: We utilize Salt Spray and Environmental Chambers to simulate real-world exposure, ensuring that AM printed structures maintain their integrity against oxidation and chemical wear.
- Intergranular Corrosion Testing: Specialized evaluation to detect localized attack at the grain boundries of 3D-printed alloys, a critical check for parts used in aerospace or marine applications.
Why Choose IMR Test Labs?
- Industry Expertise: We understand the challenges and requirements for additive manufacturing, including the nuances of different materials and processes.
- Comprehensive Capabilities: Our labs are equipped to perform a wide range of tests, providing a single source for all your validation needs.
- Quality and Accreditations: We are committed to the highest standards of quality, holding accreditations such as ISO 17025, ensuring reliable and defensible data.
- Collaborative Partnership: We work closely with our clients to develop customized testing plans that align with their project goals and regulatory requirements.
ADDITIVE MANUFACTURING VIDEO
ADDITIVE MANUFACTURING ANALYTICAL SERVICES
CHEMICAL ANALYSIS
Apparent Density
Ash Content
Carney Flow
C, H, O, N, S
Chemical Resistance
Cleanliness Testing
Coating Weight
Contaminant/Corrodent Analysis
Density
DSC Analysis (Melting Point, Glass Transition, % Crystallinity, Degree of Cure, Purity)
Filler Content Analysis
FTIR AnalysisHall Flow
Halogen Analysis (IC)
Heavy Metal Impurities
Hexavalent Chromium
ICP-AES Analysis
ICP-MS Trace Element Analysis
Ion Chromatography (IC)
Material Certification
Mercury AnalysisParticle Size Analysis PercentCrystallinity
Phase Identification
Positive Material ID (On-site PMI available)
Powder Diffraction
Precious Metal AssayScott Flow
SEM/EDX
Sieve Analysis
Trace Element Analysis
Unknown Material ID
X-Ray Diffraction (XRD)
XRF Chemistry
METALLURGICAL ANALYSIS
Case Depth
Failure Analysis
Grain Size
Image Analysis
Inclusion Rating
Intergranular Attack
Intergranular Oxidation
Macroetch/Microetch
Metallography/Materialography
Microhardness (Knoop, Vickers, MacroVickers)
Microstructure
Orientation in Microstructure
Particle Analysis (Distribution, ID, Size)
SEM Analysis
MECHANICAL TESTING
Charpy Impact Testing (-320°F to 450°F)
Creep & Stress Rupture
Fatigue Testing (Axial, Low Cycle, High Cycle, Rotating Beam, Coating Shear)
Fracture Mechanics
Hardness (Rockwell, Brinell)
Heat Aging
Indentation Toughness
DOWNLOAD OUR FREE EBOOK
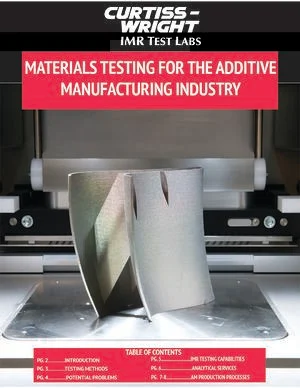
MATERIALS TESTING FOR THE ADDITIVE MANUFACTURING INDUSTRY
While Additive Manufacturing is a huge growth industry, new technologies are making the choice for raw materials a more complex decision. Taking into account design geometries, operating environments and budget concerns, AM companies have a strong need for accurate materials characterizations to enable them to project a part's design viability and operating durability.
Find out how IMR Test Labs uses a multi-disciplinary approach to Additive Manufacturing testing and analysis. Click here (or on the button below) to download our eBook.


